

In endoscopic resection procedures, we often pin our hopes on advanced equipment, yet frequently overlook the nuances of basic maneuvers. Why is it that even when the lesion appears perfectly captured, it slips out the moment we tighten the snare? Today, drawing insights from the book The Oho Method: Basic Techniques in Digestive Endoscopy, let’s uncover the microscopic details in snare manipulation that ultimately determine success or failure.
Endoscopists have likely all experienced these ‘blood pressure-spiking’ moments: You painstakingly maneuver the snare over the lesion, set the coagulation settings perfectly, and step on the pedal—only to hear a ‘snap,’ and the lesion slips out, or worse, gets piecemeal resected.
In these moments, most people’s first reaction is to blame bad luck or faulty equipment. However, in the eyes of seasoned experts who have reviewed countless procedures, this is rarely a matter of luck. It is often a ticking time bomb planted by poor operational habits.
Today, drawing on the technical philosophy of the renowned Japanese endoscopist Dr. Ken Oho, let’s dive into the two ‘blind spots’ in snare resection that are most easily overlooked by both novices and veterans alike—the fulcrum and the center.
The General Sequence of Snaring – Interlocking Steps, Each Indispensable
When operating the snare, many novices tend to rush straight for the lesion as soon as they get the device. Although their movements are fast, they often end up being messy and disorganized.
In the “Oho Method,” fixing the snare follows a rigorous logical sequence, generally divided into four steps:
Fix the snare: First, identify the fulcrum to stabilize the instrument.
Retract the outer sheath to open the snare and adjust its size: This step determines the scope of the resection. It must be precisely adjusted according to the size of the lesion.
Capture and tighten as if “welcoming” the lesion into the snare: This is an active process of “welcoming” the lesion in, rather than passively waiting for it to fall inside.
Advance the outer sheath while tightening to prevent the snare tip from displacing: This is the most critical step, and where many endoscopists often stumble. If the outer sheath is not advanced, the force of tightening will pull the snare tip backward, causing the lesion to be missed.
This process may sound simple, but every step requires a high degree of hand-eye coordination.
Focus on the Snare Tip – Finding that “Fixed Point”
Why is the tip so important? Because in the soft and dynamic lumen of the intestine, the tip acts as our operational “anchor.”
Many endoscopists are accustomed to using a narrow section of the bowel or the side opposite the mesenteric attachment as the fulcrum, but this often leads to slipping.
The secret of the “Oho Method” lies in this: using the tip of the snare itself as the fulcrum.
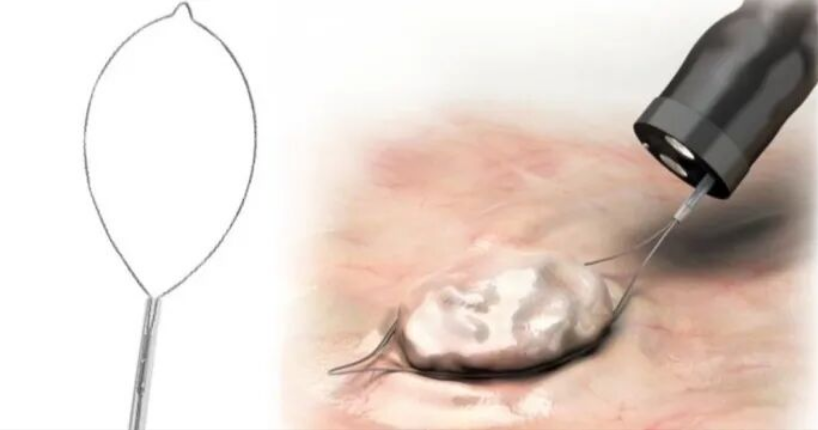
There are two specific practical techniques for this. Everyone can take a close look at Figure 1 (Fixing the Snare), which I’ve excerpted from the book:
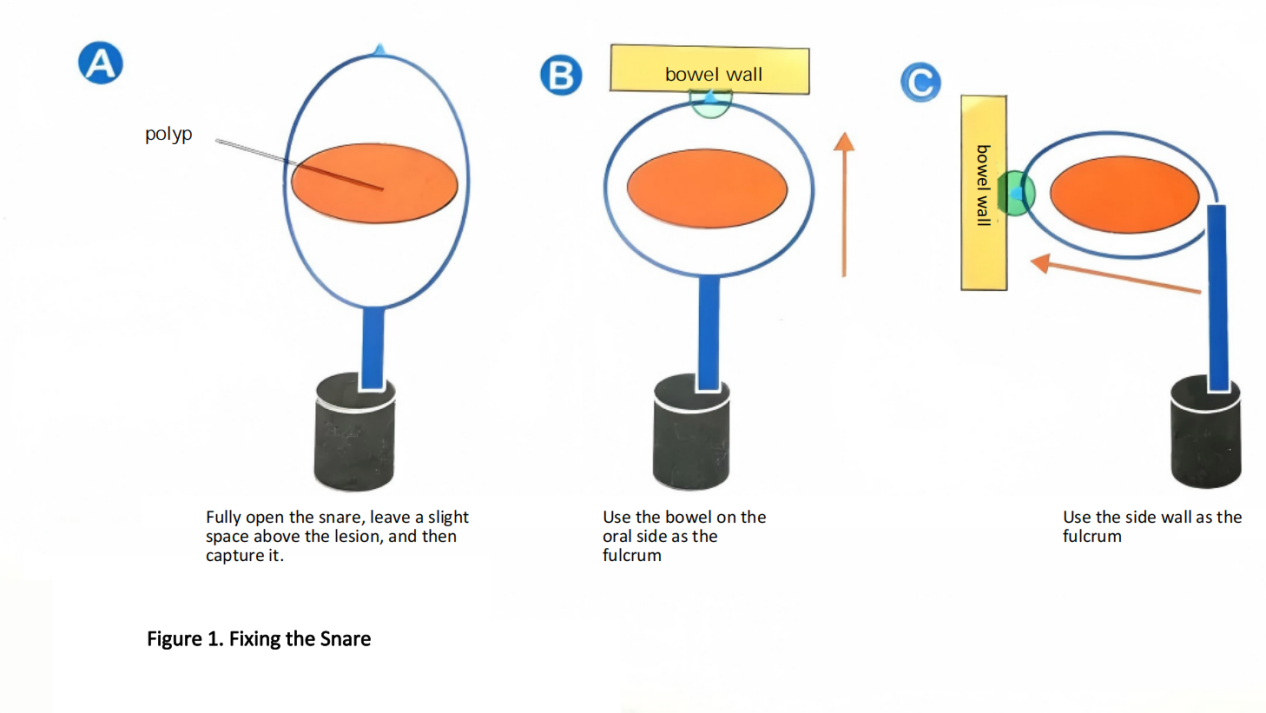
Technique 1 (Figure 1a): Fully open the snare and cover the lesion from above. This is the standard technique used when the bowel is relatively straight and the lesion is easy to capture.
Technique 2 (Figure 1b): Use the bowel wall on the oral side as the fulcrum, and slowly open the snare.
Technique 3 (Figure 1c): If there is no stable fulcrum on the oral side, you can use the side wall as the fulcrum instead. Then, slowly open the snare; this makes it easier to capture the lesion.
Note: We can only proceed with the subsequent opening and tightening steps once the snare tip is stable and firmly fixed in place without slipping. If the tip cannot hold its ground, all subsequent maneuvers will be futile.
Focus on the Center of the Snare – Avoid the Illusion of “Taking Things for Granted”
“Directly tightening the snare can cause the lesion to deviate from the center.”
Why? There is a very subtle physical phenomenon at play here.
When we tighten the snare, it gets retracted into the outer sheath. During this process, the base of the snare (the end connected to the sheath) exerts an outward pushing force. This leads to a critical outcome: the lesion is often pulled more towards the center of the snare rather than towards its base.
If you haven’t adjusted the position properly before tightening, only part of the lesion might be inside the snare while the rest is left outside. Once you activate the electrocautery, the exposed part won’t be resected, resulting in a “piecemeal resection.”
So, what is the solution?
At the exact moment of tightening the snare, you need to simultaneously advance the outer sheath little by little. The purpose of pushing out the sheath while tightening is to ensure the lesion remains right in the center of the snare (as shown in Figure 2).
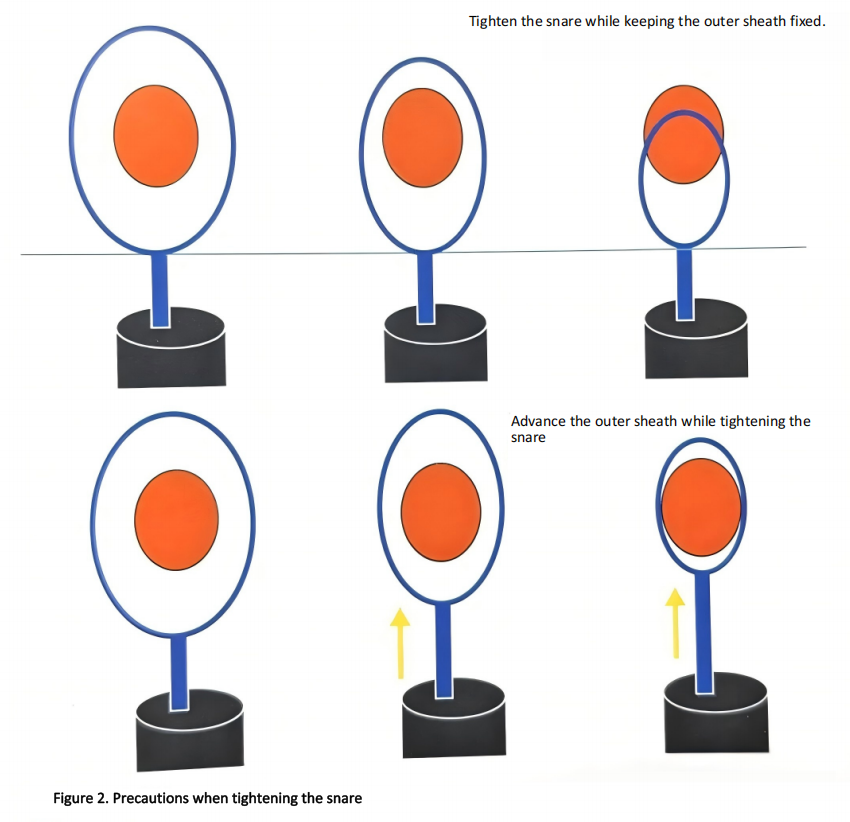
Don’t underestimate this simple move of ‘pushing out a bit before tightening’—it allows you to clearly see the lesion being completely encapsulated on the monitor, rather than just relying on ‘feel’.
Dr. Ohba’s Key Point – Stay Fully Focused to Prevent ‘Missing the Target’
Dr. Ohba has summarized the ultimate essence of snare manipulation.
If the tip of the snare isn’t pressed firmly enough against the tissue, the tip will pull away as you tighten the snare, causing the lesion to slip off. Conversely, if the tip is pressed too hard, the fulcrum will shift away from the tip to the outer sheath. Therefore, it is crucial that “the tip of the snare itself becomes the fulcrum.”
“I believe everyone has had the experience of thinking, ‘I was sure the whole lesion was inside the snare,’ only to end up with a piecemeal resection. This isn’t just bad luck; there is a reason for it. We must stay fully focused to ensure the entire lesion is inside the snare, and prevent it from slipping out during tightening!”
This statement truly resonates with countless endoscopists. What we call “bad luck” is actually just an oversight in the details of our technique.
Reading this, do you have that “aha moment”? It turns out that the little details we often overlook during procedures have already been clearly summarized by our predecessors.
“If you want to systematically learn this ‘textbook-level’ endoscopic operation system and gain a deep understanding of how Dr. Ken Ohba deconstructs every fundamental maneuver to the extreme, I highly recommend reading Digestive Endoscopy: Ohba Style Basic Techniques. Mastering the basics is the key to steady and lasting progress.”
The Right Snare Makes the Technique Complete
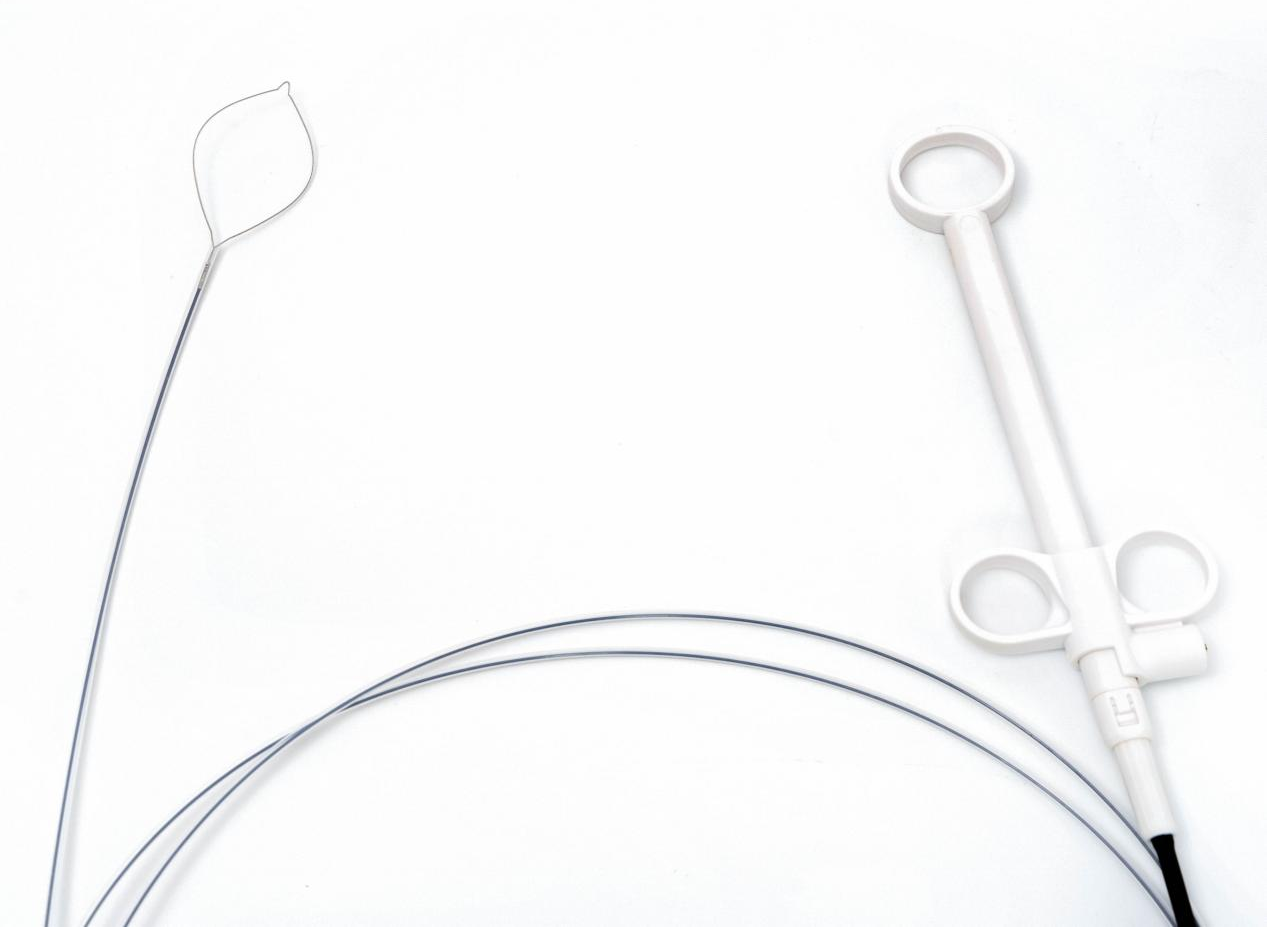
Mastering the fulcrum and center is the foundation. But a skilled hand also needs a reliable instrument. A high-quality polypectomy snare should offer:
Smooth opening and closing
No jamming, no hesitation
Consistent radial force
Reliable capture without tissue tearing
Electrosurgical compatibility
Predictable cutting and coagulation
Rotatability
Precise orientation in difficult anatomy
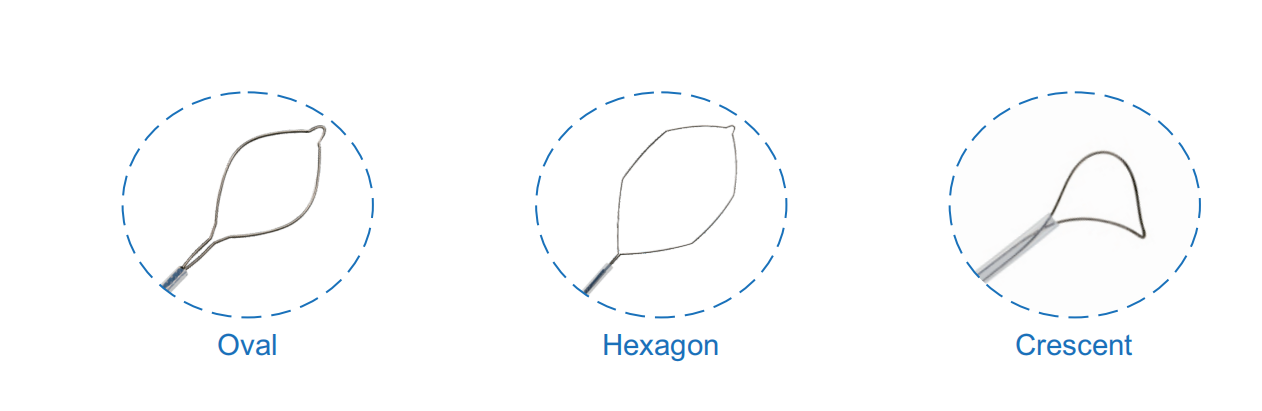
At ZRHmed, we manufacture disposable polypectomy snares designed with these clinical realities in mind. Our snares are available in oval, hexagonal, and crescent shapes, with rotatable and non-rotatable options, cold and hot use, and working lengths from 1200mm to 2300mm. All products are MDR CE certified and manufactured under ISO 13485.
We don’t make endoscopes. We make the tools that help you perform better.

Post time: Jun-05-2026